Showing posts with label tutorial. Show all posts

Tuesday, December 6, 2011

Shutter speed - controlling motion


Shutter speed

The shutter speed setting is used to control the amount of time for which the shutter is opened when taking pictures. Reduce the shutter speed will cause the camera gets more light and image will be brighter. However, if the subject or the camera is in motion, it may also cause blurred pictures. Increasing the shutter speed will darken pictures. However, this will also help prevent blur images, if the subject or the camera are in motion.

There are two main ideas for taking long exposed photos. One is to keep blurred subjects with background in focus (http://www.flickr.com/photos/paulaloe/127479512/) and the other one is opposite, keeping subject in focus and blurring background (http://www.flickr.com/photos/johnmueller/2109197876/).

shutter speed: 0,5 sec,  f4, moving snow flakes are blurred

shutter speed: 1/4 sec, f4,  snow flakes are less blurred

shutter speed: 1/8 sec, f4, slow moving snow flakes are sharp

shutter speed 1/15, f4, snow flakes are quite sharp
I kept aperture open @f4 to show how light is decreasing when we open shutter for shorter amount of time.

There are multiple techniques connected with shutter speed, naming just few:
by Krzysztof Jeleń - 1/50 shutter speed
by Ryan Notch and Edward Ayala, otherwise known as the photography team "The Areographers"

Now we know how to control shutter speed and aperture - so we have all available means to control amount of light that comes to image sensor - next step will be to understand what is ISO sensitivity all about...

Cheers!

Monday, December 5, 2011

Aperture and Depth of Field


Aperture and Depth of Field (DOF)

Aperture is an opening through which light travel from world to our film or image sensor. In combination with setting the shutter speed we can control degree of exposure to light.

I would like to bring some light on Depth of Field subject. So by adjusting the aperture we can control the amount of light passing through the lens when taking pictures. Reducing the aperture (opening it wider) increase the amount of incoming light. What happens with DOF is that further placed objects will become blurred. This principle is useful for close-ups or portraits when you want to draw attention to the subject. On the other hand, increasing the aperture will sharpen objects closer and farther. it is useful when shooting landscapes, if you want to show the whole scene.

Lets present visual explanation. Here you can find sequence of 7 images each taken while increasing aperture and exposure time, to keep same amount of light getting to sensor:

    1/15 sec @ f/2.8
    (heavily blurred edges, focus in the middle)
    1/8 sec @ f/4
    (blurred edges, focus in the middle)
    1/4 sec @ f/5.6
    (soft blurred edges, focus in the middle)
    0.5 sec @ f/8.0
    (edges become clear, focus in the middle)
    1.0 sec @ f/11
    (easy to read text on edges, focus in the middle)
    2.0 sec @ f/16
    (crispy text, focus in the middle)


    4.0 sec @ f/22
    (whole view seems to be in focus)
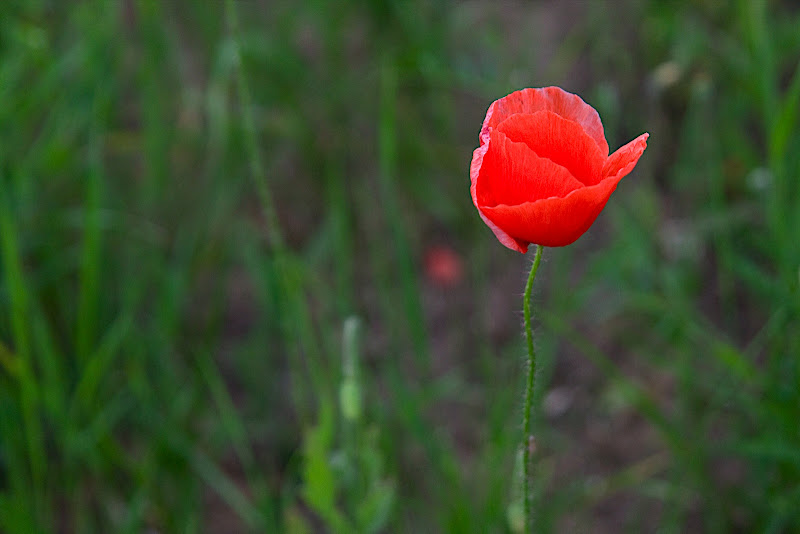
As I mentioned, with aperture wide open we want to emphasize something on the photo, it can be lonely poppy flower in Kraków (f/3.5):  


or face of your brother (f/5.6):
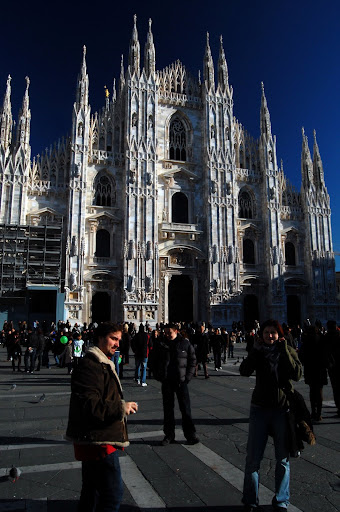
and when taking photo of the landscape, or when we want to show as many details as possible, both close and further away - we will have to close aperture, for example my temporary house in Iso Syote (f/16):

or Mediolan Duomo Cathedral (f/22): 

I hope it will help a bit :).

Cheers!